alt

Spraybond®
Canister Cleaning & Shutdown

Our helpful guide on setting up and using Spraybond® canister adhesives and primers

We recommend cleaning your hose and gun when you’re laying down the adhesive for 7 days or more, this is to prevent the chance of blockages in your hose or gun – saving downtime.

The easiest way to flush out your hose and gun is using a cleaning adaptor, check our simple step-by-step or watch the video.

If you run into any trouble you can always contact our technical team who can troubleshoot any issues you may be experiencing and ensure you are up and running without a hitch.

You can email technical@dtadhesives.com or call
+44 (0) 1785 818258. 

Step one:

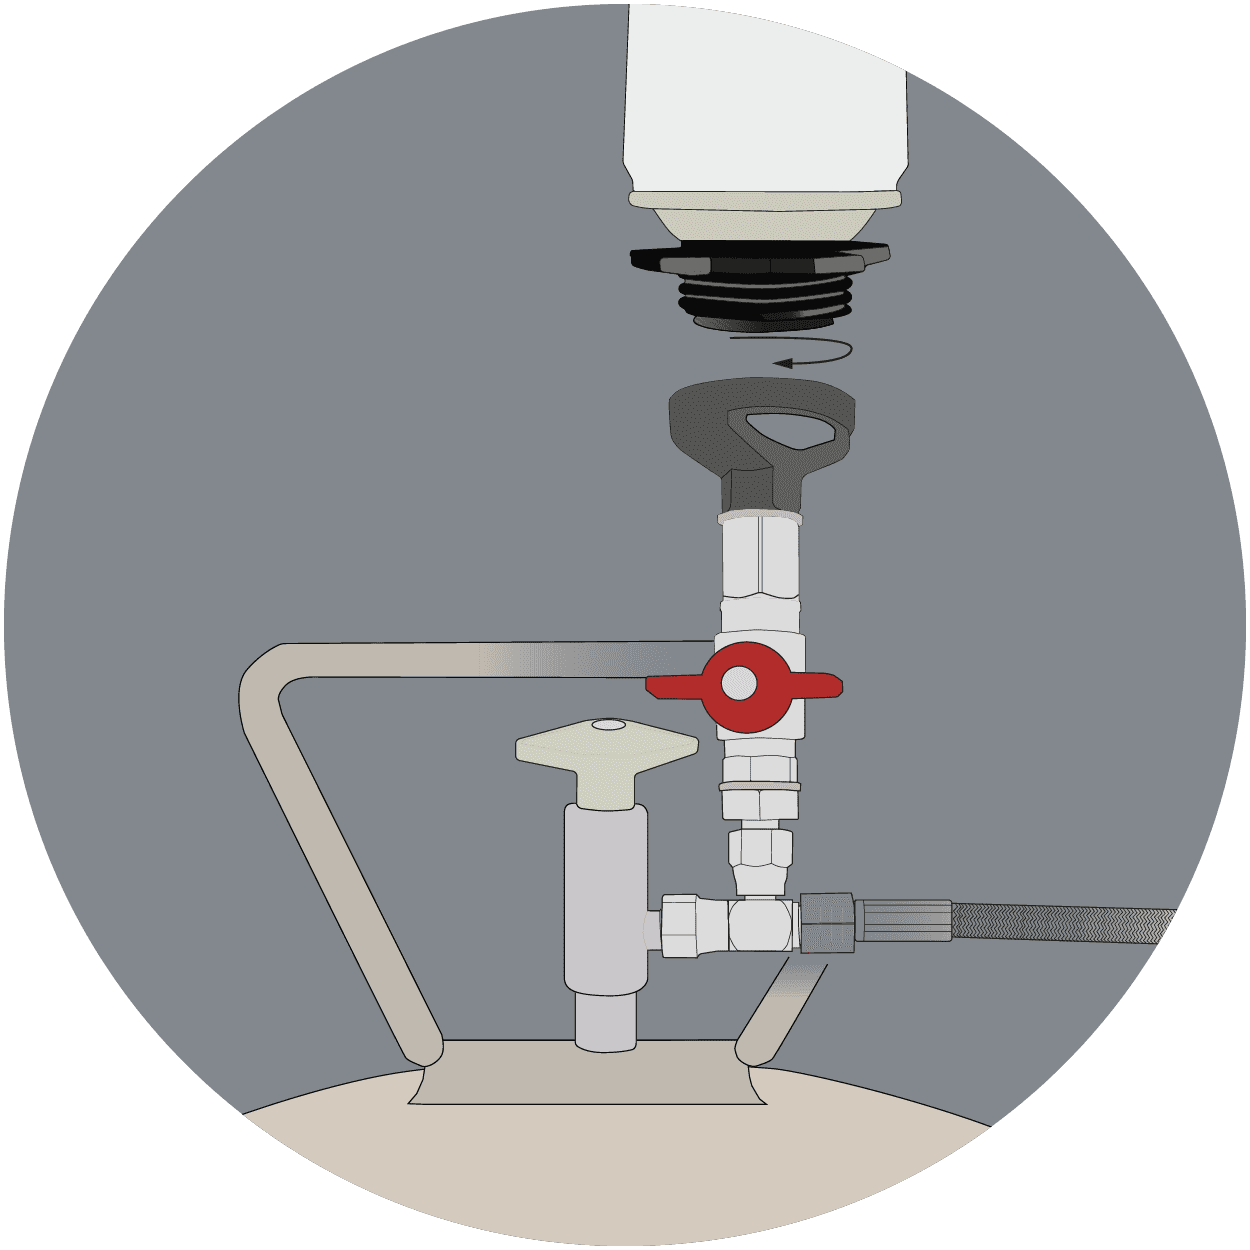
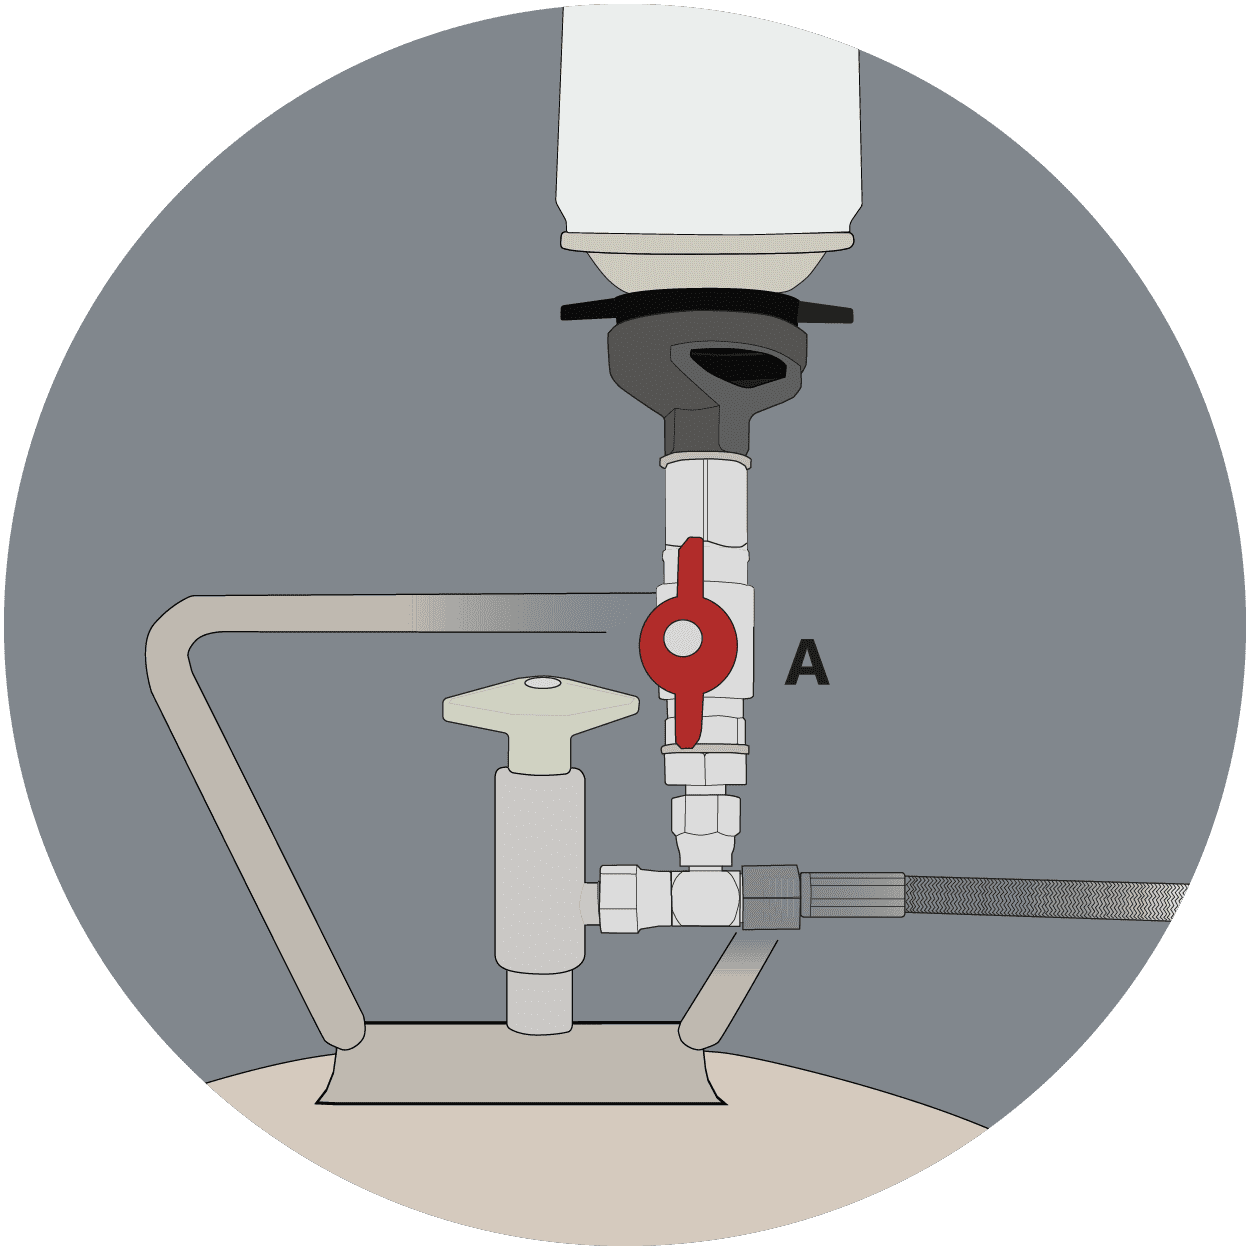
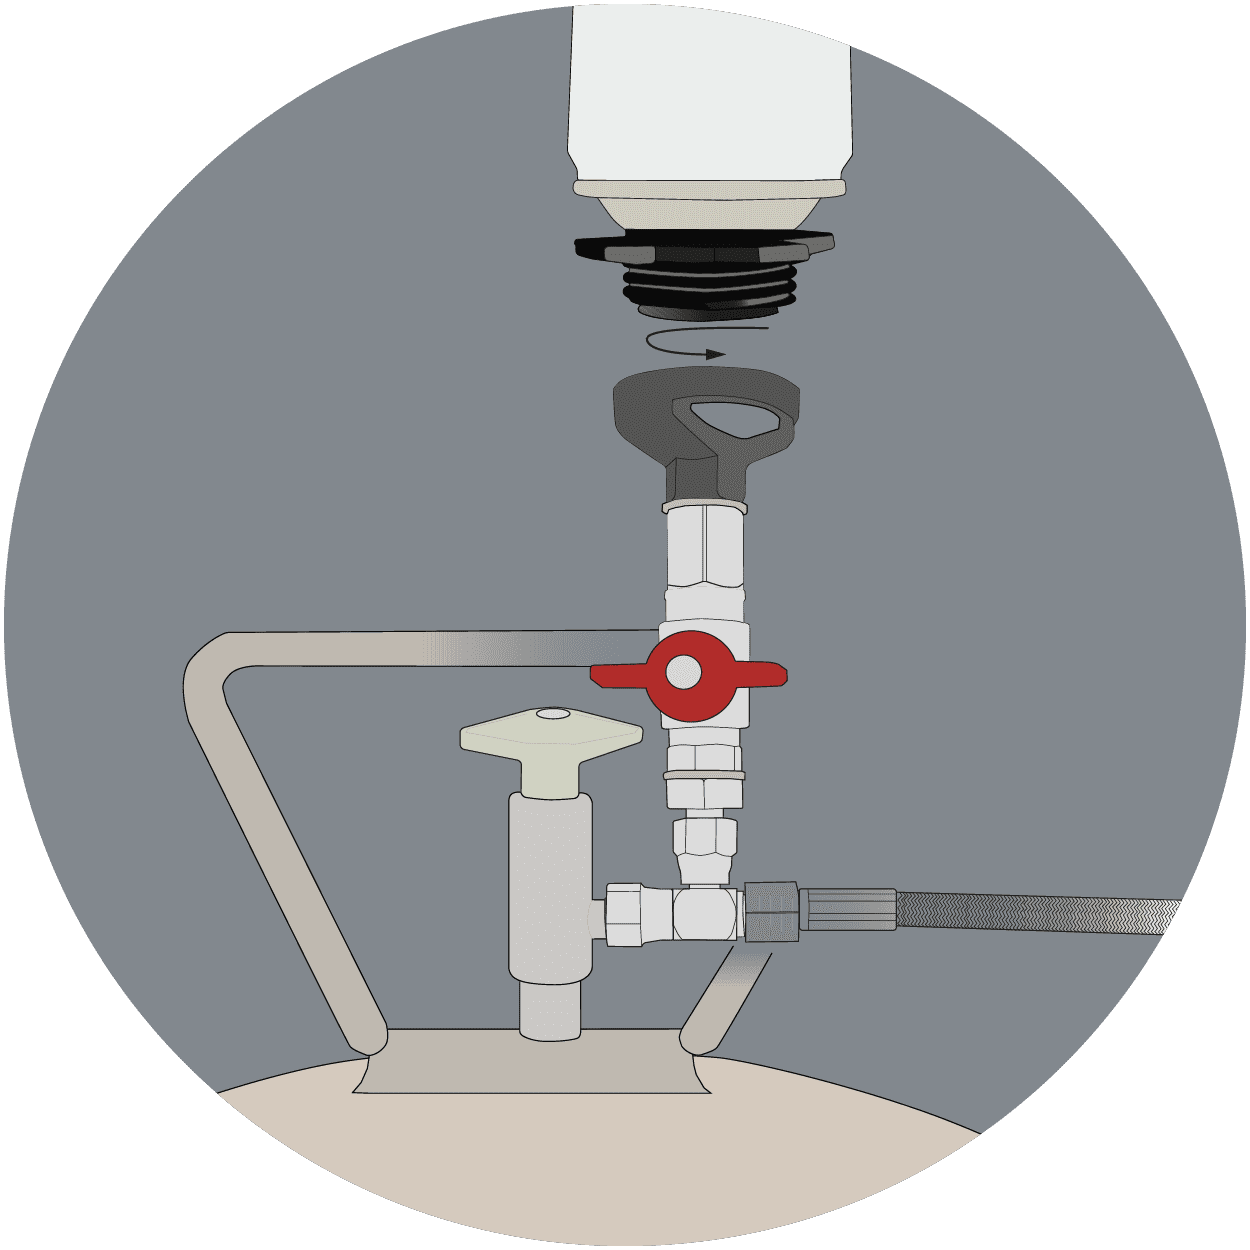
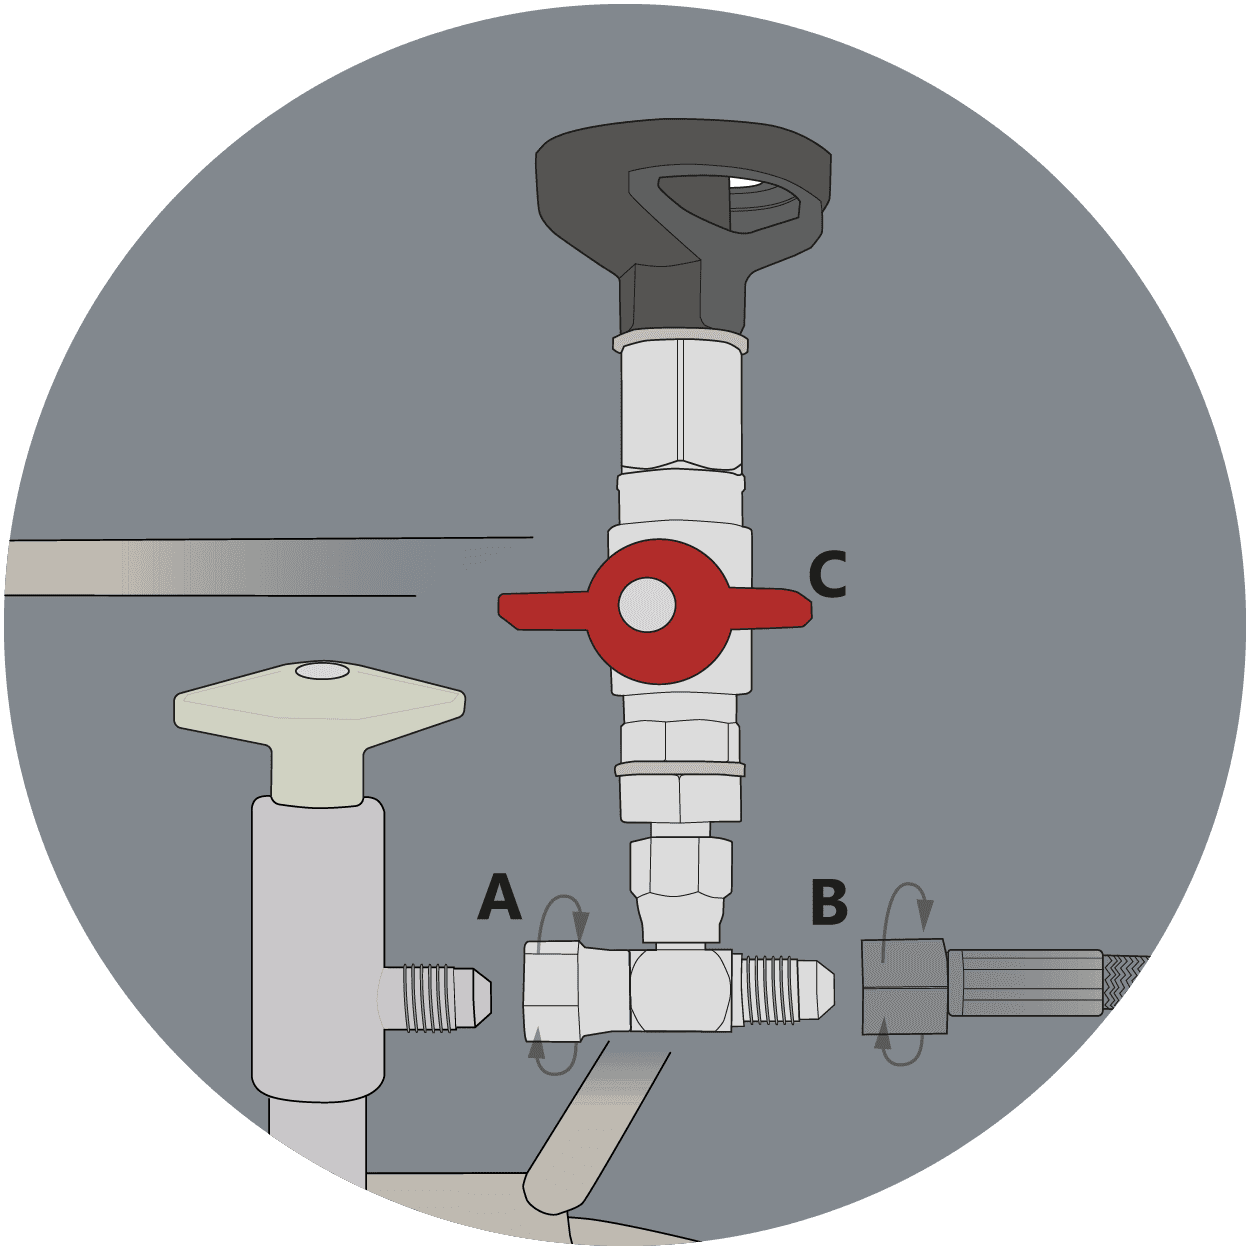
Insert a 500ml aerosol of Spraybond Cleaning Solvent into the cleaning adaptor, screwing clockwise until it is fully secured in the cleaning adaptor.

We recommend that you only place aerosols of Spraybond Cleaning Solvent into the cleaning adaptor when you are cleaning the hose and gun, do not leave an aerosol in the cleaning adaptor whilst you are applying the product. 

When cleaning the system always ensure you are in a well-ventilated area and wearing appropriate PPE such as gloves and eye protection.

Consult the safety data sheets of all products before use to ensure suitable PPE is worn.

Inserting cleaning adapter into canister adhesive
Turn-on-canister-valve-01

Step two:

Turn off the canister valve turning it counterclockwise. Ensure the valve is fully closed. 

The only time it is suitable to close the canister valve with a partly used canister is immediately before cleaning through the hose and gun with a cleaning adaptor. 

If the canister valve is closed without cleaning immediately after being closed, adhesive residue can result in the canister valve seizing and being permanently sealed in the off position.  

Step three:

Ensuring the spray gun is not in use and is in the closed position, open the valve on the cleaning adaptor (A) to the vertical position as shown in the image in this section. 

Allow 1 – 2 minutes for the hose and gun to fill with solvent.

Turning on cleaning adaptor-01
Cleaning-hose-and-spray-gun-01

Step four:

Using a suitable waste receptacle, place the end of the spray gun into the waste receptacle. Ensure the control knob on the spray gun is open, pull the trigger to eject the solvent. 

Continue to spray until the solvent is spraying clear and no adhesive residue remains. 

Step five:

Close the cleaning adaptor valve ensuring it is in the horizontal position as shown in the image in this section. Once closed, unscrew the aerosol can of Spraybond Cleaning Solvent. 

Once the valve is closed and the aerosol is removed, proceed to continue to eject the remaining solvent within the hose and gun into the waste receptacle. Continue to spray until the hose and gun are depressurised and no solvent remains. 

remove-aerosol-from-cleaning-adaptor-01
cleaning-spray-tip 300-01

Step six:

Now is the perfect time to ensure your spray tip is clean, scrub the spray tip with a wire brush making sure that no adhesive or primer residue remains. 

Step seven:

Now the tip is clean and the hose and gun have been depressurised, the spray gun, hose and cleaning adaptor can be dissembled and disconnected.


Take care when removing the hose in case some residual solvent remains. 

Canister-assembly-hose-connection-01
Disembled-spray-tip 300-01

Step eight:

If your spray gun has been put through its paces, we would recommend removing the front nut which secures the brass spray tip. 

Please note that a removable spray tip is only present on DT-STD & DT-SG spray guns. 

Once removed the brass spray tip could be soaked in an appropriate tin with solvent and left to soak. The tip can then be removed and cleaned thoroughly with a wire brush. Always check the back of the spray tip to see whether any residue remains. 

Scroll to Top

Can't find what you're looking for?

Fill in your details below and a member of our team will contact you as soon as possible

TDS Request

Fill in your details below and a member of our team will contact you as soon as possible